
Trending In Refrigerators
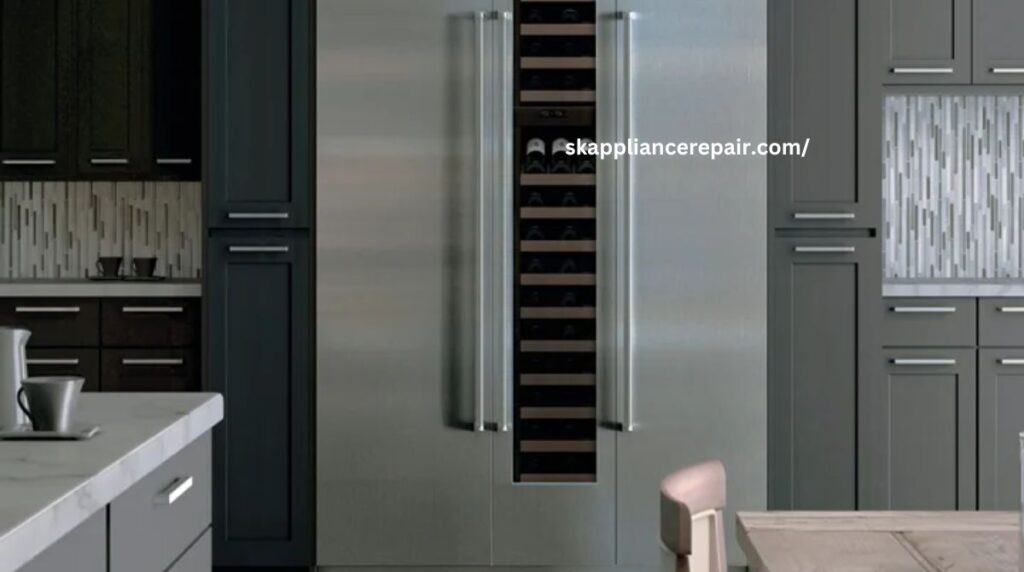
Sub Zero refrigerators have become increasingly popular due to their ability to maintain food freshness and quality for longer periods compared to other models. Unfortunately, problems can arise when it comes to repairing these high-end appliances. This article provides a comprehensive overview of how to repair a Sub Zero refrigerator in the event of a malfunction. contact us if you need professional help, we are glad to offer our services for subzero refrigerator repair in Washington DC.
Sub-zero refrigerator repair tip
The first step is determining what type of problem you are experiencing with your refrigerator. Common issues include water leaking from the doors, frost buildup inside the freezer compartment, or temperatures that do not remain consistent throughout all sections of the unit. It is important to be aware of any warning signs before attempting repairs as they can indicate more serious underlying problems such as compressor failure or electrical malfunctioning. Please check our article Expert Tips: Common Appliance Repairs For Refrigerators You Can Diy
Once an individual has identified the possible cause behind the issue they face with their fridge, it becomes necessary to take appropriate action steps towards resolving it quickly and efficiently. The most effective way to go about this may vary depending on various factors including the severity and complexity of the issue as well as cost considerations. In some cases, simple troubleshooting techniques may prove helpful while in others professional assistance may be needed for optimal performance results.
let’s dive into the details.
What Is A Sub-Zero Refrigerator?
A Sub-Zero refrigerator is a type of built-in or freestanding cooling unit that uses advanced technology to provide precise temperature control. This type of appliance is renowned for its superior performance and energy efficiency, which makes it an ideal choice for people who need reliable food storage solutions in their homes. There are several models of Sub-Zero refrigerators available on the market today, ranging from full-size units to under-counter designs.
The main feature that sets these appliances apart from other types of refrigerators is their ability to maintain internal temperatures within a set range. The interior environment can be adjusted anywhere between 34 and 44 degrees Fahrenheit, depending on what needs to be stored inside the unit. Additionally, most Sub-Zero refrigerators come with two distinct cooling systems: one for fresh foods such as fruits and vegetables and another for frozen items like ice cream and meats.
Sub-Zero refrigerators also offer outstanding energy efficiency compared to standard refrigerator models, consuming significantly less power while still delivering exceptional temperature control. While they may require more initial investment than regular fridges, their long-term savings can easily offset this difference over time.
Troubleshooting Tips
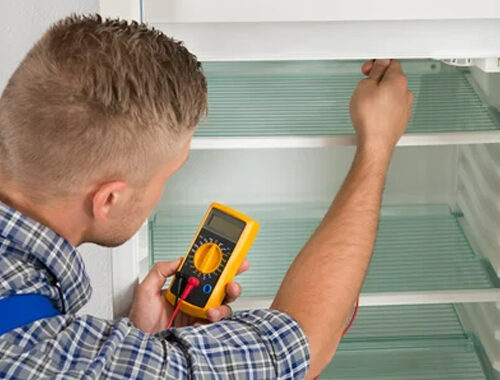
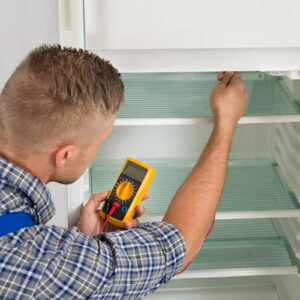
When dealing with a Sub-Zero refrigerator, it is important to understand the basics of troubleshooting. This section will provide some tips on how to diagnose electrical issues, check temperature settings, remove ice buildup, and refill Freon.
The first step in troubleshooting a Sub-Zero refrigerator is to identify any potential electrical problems that may be causing issues such as abnormal temperatures or poor cooling performance. To do this, try unplugging the unit for at least 15 minutes before plugging it back in again. Additionally, inspect all wiring connections and replace any worn-out components if necessary.
It can also be useful to check the temperature settings of your fridge and make sure they are set correctly according to manufacturer specifications. The recommended optimal temperature range for most Sub-Zero refrigerators is between 35°F – 38°F (1°C – 3°C). If these settings have been adjusted incorrectly, you may need to reset them manually using the control panel located inside the appliance.
In addition, excess ice buildup can cause temperature fluctuations within a Sub-Zero refrigerator and should also be addressed promptly. To resolve this issue, simply use an ice scraper or spatula to remove any accumulated frost from inside the freezer compartment before refilling the unit’s Freon levels with fresh coolant solution as needed.
- Diagnose Electrical Issues
- Check Temperature Settings
- Remove Ice Buildup
- Refill Freon Levels
Finally, once all of these steps have been completed successfully, plugging in the unit should restore normal operation.
Unplugging The Unit
Before beginning the repair process for a Sub Zero refrigerator, it is important to unplug and disconnect the power of the unit. The following steps will guide you through this procedure:
| Step | Description |
| 1 | Unplugging the Unit from its Power Outlet |
| 2 | Disconnecting any Wires Connected to the Unit |
| 3 | Removing Cords or Plugs Attached to the Unit |
To begin, locate and find the outlet that your Sub Zero refrigerator is connected to. Then, firmly grip both sides of the plug and pull gently until it has been removed from its socket to unplug it. Afterward, remove any wires that are attached by carefully pulling them off or unscrewing them. Lastly, ensure all cords or plugs related to powering up the unit have also been disconnected from their respective outlets before proceeding with other repairs.
With these measures taken, your Sub Zero refrigerator should now be powered down and ready for further repair work such as replacing parts if necessary.
Replacing Fridge Parts
Once the unit is unplugged, it is time to assess what needs to be replaced. This could include refrigerator parts such as door seals, freon refills, and other Sub Zero-specific parts that may need attention. It is important to consult a professional technician when replacing any of these components in order to ensure safety and proper installation.
In some cases, an entire component or system will require replacement if its functionality has been compromised due to age or wear. If this is the case, finding compatible replacement parts for a Sub Zero refrigerator can be challenging since many manufacturers do not make exact replacements for them. In such scenarios, using generic but safe products might be necessary until official Sub Zero replacement parts become available.
When assessing which specific parts are needed for the repair or maintenance of a Sub Zero refrigerator, it’s always best practice to seek out advice from an experienced technician who specializes in handling these units. With their help and guidance, selecting the right part and ensuring the correct installation should prove successful in restoring your appliance to working condition. Having done so successfully, then it’s on to cleaning the coils and condenser in preparation for use again.
Cleaning The Coils And Condenser
It is important to clean the refrigerator coils and condenser regularly when performing maintenance on a Sub Zero refrigerator. The coil cleaning can be done with a vacuum cleaner by going over both sides of the coils and making sure all dust particles are removed. It is also recommended to use an air compressor or brush attachment for more thorough cleaning.
The condenser should then be cleaned using either a damp cloth or compressed air. To do this:
- First, unplug the unit and remove any panels that may obstruct access to the condenser area.
- Wipe down the surface of the condenser with a damp cloth, taking care not to damage it in any way.
- Once finished, replace any panels or covers that have been removed before plugging in the refrigerator again.
After completing these steps, check that all components are working properly and that there is no debris left behind from cleaning. Make sure that your refrigerator coils and condenser are free of dirt and grime so they continue functioning optimally as part of your Sub Zero fridge system. After verifying these items are running correctly, proceed to check the temperature settings.
Checking Temperature Settings
The average home refrigerator maintains a temperature between 34-38 degrees Fahrenheit. To ensure that your Sub Zero refrigerator is cooling properly, it is important to check the temperature settings. Adjusting the temperature can help you diagnose many potential issues with your appliance, and may even prevent future malfunctions.
First, locate the control panel of your Sub Zero refrigerator. Depending on the model, this may be an electronic touchpad or mechanical dials; either way, each set should correspond to a specific function within the unit. After familiarizing yourself with how these settings work, begin by adjusting the temperature control as necessary. If you notice any changes in performance while doing so, make sure to record them for later reference.
It is also important to note what temperatures are optimal for different food items stored inside your fridge. Perishable foods such as meats and vegetables require colder temperatures than other items like condiments and beverages – adjusting the settings accordingly will help keep all food items fresher for longer periods. Additionally, ensuring that all shelves are evenly spaced apart from one another helps maintain consistent air circulation throughout the entire compartment.
By taking some precautions when handling your Sub Zero’s temperature controls, you can maximize its effectiveness and efficiency while minimizing unnecessary wear and tear on components over time. Next, we’ll discuss checking door seals and gaskets – essential parts that play a major role in maintaining proper levels of cold air retention within the unit’s interior compartments.
Checking Door Seals And Gaskets
The next step in repairing a Sub Zero refrigerator is to check the door seals and gaskets. The seal and gasket are important components of keeping cold air inside the unit, so they must be inspected regularly for damage or wear. To begin, open the fridge door and inspect all edges where the seal meets the frame. If there are any gaps or tears, then these need to be repaired immediately with new parts.
Next, examine each side of the gasket along its entire length. Make sure there are no signs of cracking, tearing, or peeling; if any of these issues are present, then it is likely time to replace them with a new one. It may also be necessary to clean the existing gasket by wiping down both sides with warm water and mild detergent. Once complete, make sure that the seal has been firmly reattached around each edge of the door frame before proceeding further.

Lastly, conduct a thorough inspection of the refrigerator itself from top to bottom. Be sure to look at every corner and crevice for signs of condensation or other leaking problems that could indicate an issue with either the seal or gasket not properly sealing against their respective surfaces. Any such areas should be addressed as soon as possible to ensure optimum performance from your appliance going forward. With this key part of maintenance completed, you can now move on to checking for leaks around any plumbing connections to keep your Sub Zero refrigerator running efficiently and reliably over time.
Checking For Leaks
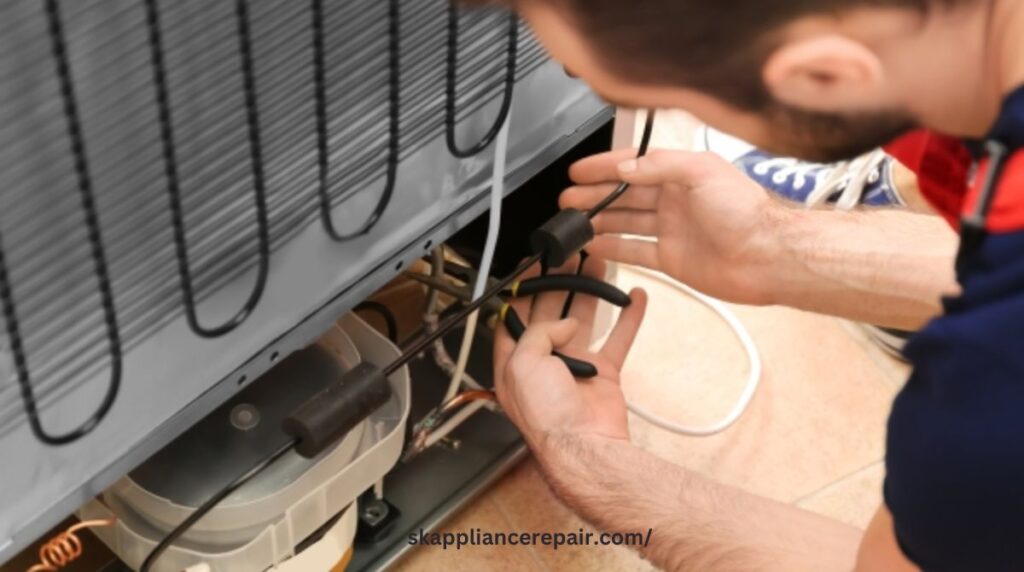
Before diagnosing any electrical problems, it is important to check for leaks in a Sub Zero refrigerator. Leak detection can help prevent water damage due to condensation lines that are connected to the unit’s evaporator coils. A pressure test should be performed on all hoses and clamps to ensure there are no cracks or breaks. All connections need to be checked for signs of corrosion such as discoloration or rusting. Additionally, the drain pan underneath the unit needs to be inspected for any standing water which may indicate a leak from one of the pipes or other parts within the system. If any of these issues are found, they must be replaced before further diagnosis takes place. To conclude this section, once all potential causes of leakage have been addressed, it is time to move on to diagnosing electrical problems with the fridge.
Diagnosing Electrical Problems
Once the refrigerator has been checked for potential leaks, it is time to diagnose any electrical problems that may be present. Electrical diagnosis begins with identifying any power issues that could be causing a problem in the appliance. If there are no visible signs of an electrical fault, then the next step would be to troubleshoot the power source and circuit connections for any damage or faults.
To begin diagnosing any possible electrical issues:
- First, check to make sure all connections related to the refrigerator are secure and functioning correctly.
- It is important to inspect both internal and external wiring as either can cause power problems if not connected properly.
- Once these initial steps have been completed, further inspection of other components such as relays, switches, and fuses should be done to ensure they are working correctly.
Additionally, checking wires and connectors for corrosion or wear can help identify potential sources of electrical faults before more serious repairs become necessary.
After inspecting each component individually, testing them together will provide greater insight into what might be causing any power issues within the appliance. This process involves simulating real-world conditions while monitoring voltage readings on different parts at various stages – this allows technicians to pinpoint exactly which part is experiencing a circuit fault so appropriate measures can be taken to repair it accordingly.
With the knowledge gained from diagnosing potential electrical problems in a sub-zero refrigerator, it becomes easier to take corrective action by replacing faulty components or repairing damaged wiring when needed. The following section covers how to replace light bulbs in a sub-zero fridge unit safely and efficiently.
Replacing Light Bulbs
Although it may seem intimidating to replace a light bulb inside of a refrigerator, the process is quite simple. Taking note of safety precautions such as unplugging the power cord from the outlet and wearing protective gloves are important steps before beginning. With these considerations in mind, one can easily begin replacing their Sub Zero refrigerator’s light bulb with minimal effort.
The first step for any replacement job is locating where the old lightbulb needs to be removed. On most models, this will usually be located at the top or back wall of the unit. In some cases, there may be screws that need to be unscrewed to access the compartment containing the lightbulb. Once inside, remove the old bulb by carefully twisting it counterclockwise until it comes loose, and discard it safely.
Next, insert a new Subzero fridge light bulb into place making sure its wattage matches that specified in your owner’s manual or on the previous model’s documentation. Carefully twist clockwise until secure then re-screw any components needed before closing up the cover again. After completing this process successfully you should now have an illuminated interior when opening your fridge door! Transitioning smoothly into the subsequent section about removing ice build-up, we must assess how much buildup exists within our freezer walls before taking actionable steps towards resolving them.
Removing Ice Build Up
Ice buildup can be a common problem for SubZero refrigerators. It is important to address and remove excess ice buildup to maintain the optimal functioning of the refrigerator. To begin, it is essential to understand how to effectively prevent or avoid any potential future ice buildup from occurring.
To eliminate existing ice buildup, some basic steps need to be taken. First, all food must be removed from the freezer section and placed in another container while this job is being done. Next, unplugging the refrigerator will ensure that no electricity runs through it which could cause harm during the removal of the built-up ice. After these two precautionary measures have been completed, use an appropriate tool such as a hair dryer or hairdryer nozzle on low heat setting and direct it towards the frozen area with blockage until melted away. Vacuum up the remaining water droplets afterward or wipe them down with a towel if necessary. Finally, take preventive action by manually defrosting your Sub Zero refrigerator from time to time to help keep extra moisture out and reduce the chances of future accumulation of unwanted ice buildup inside the appliance’s freezer walls.
Having addressed ice buildup prevention and removal methods for Sub Zero refrigerators, attention should now focus on refilling freon levels within the unit’s cooling system so that temperature may remain constant throughout both compartments.
Refilling Refrigerator Freon
Have you ever wondered how to refill freon in a subzero refrigerator? Refilling the refrigerant, or freon top-up, is an important step when repairing a Subzero refrigerator. Below are listed three steps that must be taken to properly charge the freon:
- First, inspect the system for any signs of damage such as leaks or corrosion.
- Second, evacuate the existing refrigerant from the system and replace it with new refrigerant.
- Third, check for proper pressure levels and verify that all connections are secure. Before refilling freon into the system, one must make sure they have obtained the correct type of replacement refrigerant according to their particular model of Subzero refrigerators. It is also essential to ensure all safety precautions have been followed while performing this task – gloves and goggles should always be worn while handling any kind of coolant or pressurized gas cylinders. Following these guidelines will help ensure the safe and effective operation of your appliance after completing a successful refrigerant recharge. Once finished with this process, selecting appropriate parts for repair may begin.
Selecting Replacement Parts
When repairing a sub-zero refrigerator, selecting the appropriate replacement parts is an essential step. It is important to ensure that the parts will be compatible with the make and model of the appliance. In many cases, it may also be necessary to purchase sub-zero-specific parts to guarantee compatibility.
A variety of websites sell genuine sub-zero refrigerator parts for various models and makes. Shopping online can provide access to a larger selection of products than what would typically be available from local retailers. However, when ordering these items online, customers should confirm that they are buying genuine sub-zero parts as opposed to aftermarket or generic replacements which could potentially cause further damage if not installed correctly.
It is recommended that all replacement parts are purchased before any repairs are started to minimize delays due to unavailability or incorrect part selection. With correct preparation and planning, this process can help ensure successful repair outcomes while avoiding potential problems down the line. As such, proper consideration should be given to researching and selecting replacement parts before beginning any repair work on a Sub-Zero refrigerator.
Having acquired all necessary components, the next step involves locating a technician who has experience working on refrigerators of this type to complete the repair job properly.
Finding A SubZero Fridge Technician
Locating a technician for your Subzero refrigerator repair is as simple and easy as finding the Holy Grail; in some cases, it may even be harder. It can seem like an impossible task since not all technicians are certified to work on specific brands of refrigerators. Therefore, the first step when searching for a technician should be conducting research into what types of repairs they specialize in and if they have experience with Sub Zero appliances.
In addition, you will want to ensure that their rates are competitive compared to other local service providers. You also need to check whether they offer any warranties or guarantees after the repair has been completed. Finally, ask friends and family who use Sub Zero refrigerators if they know someone reputable who provides excellent services at reasonable prices. This way, you can be sure that you’re hiring an experienced professional with knowledge about Sub Zero refrigerator repairs.
It’s important to find a trustworthy technician who is knowledgeable about repairing this type of appliance so that the job is done correctly – saving money over time by avoiding future costly repairs with due diligence upfront can help avoid headaches down the road. Moving forward, proper maintenance of your Sub Zero refrigerator is essential for ensuring its longevity and performance efficiency.
At SK Appliance Repair Services, we have the best experts who can help you with appliance repair and installation
Maintaining Your Refrigerator
Refrigerator maintenance is an important part of keeping your Sub Zero refrigerator in optimal condition. Regularly maintaining the temperature and cleaning out any built-up debris can help keep it running efficiently for years to come. It’s also a good idea to take preventive measures to avoid unnecessary repair costs, like ensuring food items are properly stored and away from heating elements or other parts that could be damaged.
To maintain your Sub Zero refrigerator, you should check the temperature regularly and make sure it is kept between 37°F – 40°F (2.7°C – 4.4°C). If dust builds up inside or around the coils, use a soft brush attachment on a vacuum cleaner to gently remove it without damaging it. Pay special attention to areas where moisture may have collected over time, such as underneath the vegetable drawer or near condenser tubes at the back wall of the unit. Additionally, using baking soda mixed with warm water will help eliminate odors by removing bacteria buildup.
When storing food items in your Sub Zero refrigerator, ensure they are not blocking air vents which can affect cooling performance if restricted airflow occurs. To prevent spoilage and contamination, all perishable foods should be properly sealed before placing them in their designated compartments within the fridge, especially those containing raw meats or vegetables which require extra care when handling.
Conclusion
Repairing a Sub-Zero refrigerator can be an expensive and complex process. Knowing the cost of repairs, how often to clean internal components, and when to replace door seals and gaskets are all important considerations before attempting any repair job. Additionally, it is necessary to identify Freon leaks to prevent further damage or harm caused by exposure to toxic chemicals.
When deciding whether or not to hire a technician for the repair job, one must consider the complexity of the problem as well as their skill level. If unsure about tackling the task alone, then seeking professional help may be beneficial in ensuring that the repair is done correctly and safely. Professional technicians are also able to diagnose problems more accurately than most individuals due to their experience with various appliances.
Overall, understanding what steps need to be taken when repairing a Sub-Zero refrigerator can save time and money while avoiding potential hazards from incorrect repairs. Proper maintenance, knowledge of common issues, and hiring experienced technicians when needed can provide peace of mind knowing that these costly appliances such as Subzero fridges are being properly cared for.